How To Migrate From Webflow To WordPress

Considering a move from Webflow to WordPress? Webflow is fantastic for crafting visually striking websites with ease. But when it comes to flexibility, sacling, managing and adding features to a website, WordPress is undoubtedly the leader.
WordPress is incredibly popular, running more than 40% of all websites. This is largely due to its reputation as a powerful, stable and reliable Content Management System (CMS). It has been around for a long time, making it a perfect choice for those thinking of changing website management platforms.
With WordPress, you can add features, functionalities or even change designs with the help of plugins which are designed to make your site easier to manage and cut down on development time. Webflow has its own advantages, offering unique features and a user-friendly experience with less need for coding skills.
Table of Contents
- Why migrate from Webflow to WordPress?
- Step-by-Step Guide To Migrate From Webflow To WordPress
- Ready for a seamless Webflow to WordPress transition? Let us guide you.
- FAQs
Ready to start your journey from Webflow to WordPress? Let’s begin and make your transition as smooth as possible!
Why migrate from Webflow to WordPress?
Webflow is a user-friendly platform that simplifies the process of building and launching websites. It’s an all-in-one solution, combining website building tools with hosting services.
However, this ease can sometimes restrict your website capabilities. Since Webflow manages most aspects of your site, you might find yourself limited in adding new features or making changes to your content.

WordPress, is an open-source Content Management System (CMS) and it definitely offers more flexibility in developing websites of your requirements. There are hundreds of plugins available for WordPress, opening up a world of customisation, allowing you to tailor your site to your exact needs and preferences.
Unlike Webflow’s all-in-one approach, WordPress lets you choose your own hosting provider and other necessary services.
WordPress is mostly free to use and the same is the case for many plugins. Switching from Webflow to WordPress opens up a world of possibilities for your website. Whether you are looking to scale up, add more features or functionalities, WordPress is the go-to CMS to upgrade to.
If you’re curious to dive deeper into the differences between these platforms and understand which one truly fits your needs, check out our comprehensive guide on “Webflow vs WordPress.”
Step-by-Step Guide To Migrate From Webflow To WordPress
Prepare for WordPress Migration
The first and most important step is to be prepared for WordPress migration. This involves finalising your current Webflow website, configuring WordPress environment and planning for actual migration. These are some of the areas you’d want to look into.
Site Structure
Site structure is important as it is basically the skeleton of your website. Before migrating, analyse the overall layout and framework of your Webflow site including your navigation, page hierarchy, and any unique structural elements you’ve added to your website.
Content
Then you will need to Identify all the content you need to migrate. This includes all the webpage contents including text, images, videos, and media. Make sure to check for any content that might need finalising, updating or revising during the migration process.
SEO Settings
SEO takes huge effort and your current SEO efforts should not go to waste. Export your settings or get them in format that can later be restored. If you do not want to loose your page rankings, the URLs, meta-tags and titles are crucial.
Integrations and Custom Code
If you’ve added any custom code or 3rd party integration that you need, you will need a way to save, document and implement in your WordPress website. This might include forms, analytics tools, or custom CSS and JavaScript.
Set Up Hosting & Install WordPress
Before you can start using WordPress, you need a hosting server for your website to live. This means setting up a domain name and choosing a web hosting service.
If you already have a domain name with your Webflow site, you can redirect the new WordPress website to your existing domain after the migration is complete and WordPress site is ready to be launched.
Once your hosting is ready, it’s time to install WordPress. Most hosting providers offer easy, one-click WordPress installation, making this step relatively straightforward. After installation, you’ll access the WordPress dashboard, where you’ll manage your website.
Choosing and Installing a WordPress Theme
You want your website to be functional as well as aesthetically pleasing, this is where a WordPress theme comes into play. WordPress themes define the way your website looks and functions so make sure to choose the one that fulfils these requirements.
WordPress offers hundreds of freehand paid themes to choose from, make sure to choose the theme that matches your website requirements. Other things to consider include responsiveness, mobile and SEO friendliness. After you’ve selected a theme, install and activate it on your WordPress site. Search for themes in WordPress(.org).

You have now successfully set up the basics required for the migration. After setting up your WordPress environment, the next step is to transfer your website content from the Webflow platform to your WordPress.
Accessing Your Webflow Content
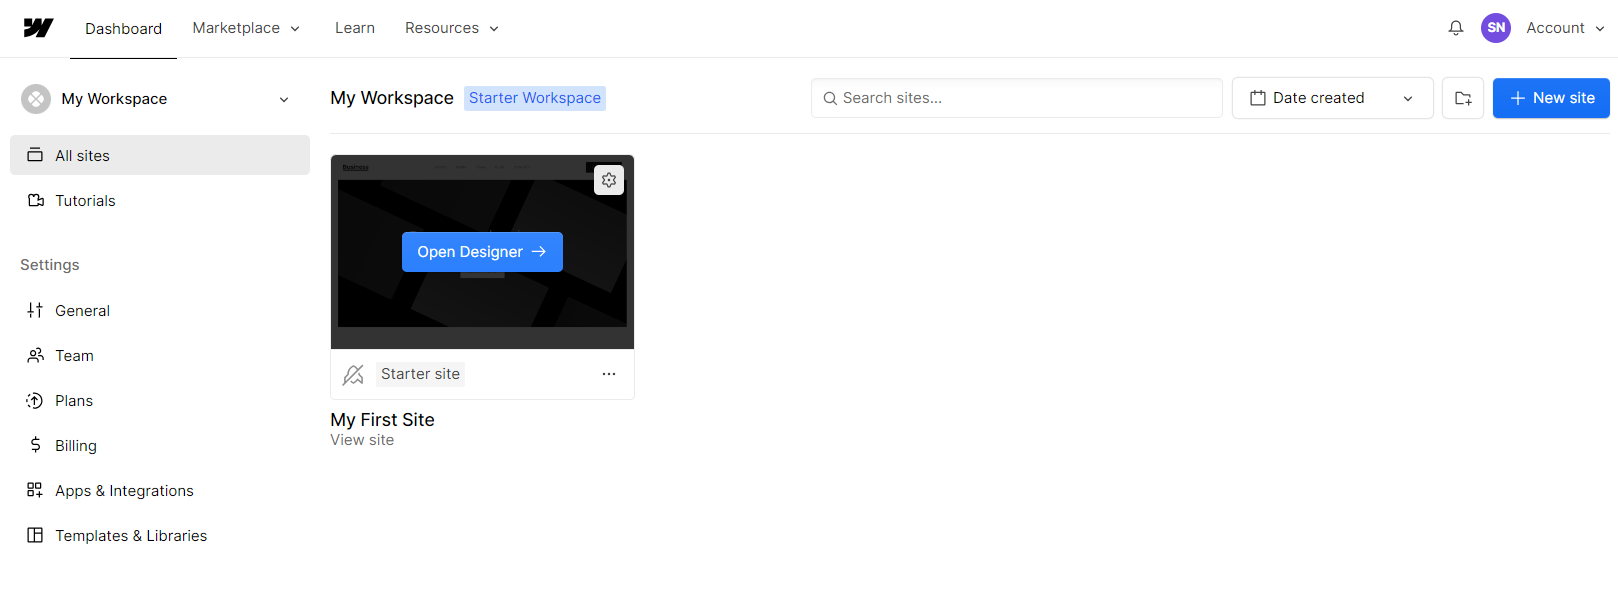
First, start by navigating to the Webflow Designer and then to the Collections panel. This area of your Webflow dashboard displays all your website projects and the files stored on their servers. Open the collection that you wish to export.

Exporting Your Collections
Once you’ve opened the desired collection, look for the “Export” button on the top right hand side. Clicking this will allow you to download the collection’s content.

You can repeat this process for as many collections as you need. It’s a straightforward way to export your Webflow website’s core content.
We can export Webflow pages, blog posts, texts, blocks, and gallery pages to a CSV file and use a CSV import WordPress plugin to migrate them to WordPress CMS.
Limitations of Webflow Export
While exporting content from Webflow, you can easily export standard web pages, blog posts, gallery pages, texts, embedded blocks, and images. There are certain elements that Webflow does not export automatically.
This includes event pages, product pages, album pages, audio files, video blocks, product blocks, index pages, as well as custom CSS and styling. These will need to be migrated to WordPress manually.
Import Webflow Content To WordPress
With your Webflow content already exported, it’s time to focus on importing the exported contents into your new WordPress environment.
Use Import Tools in WordPress
Log into your WordPress admin dashboard (yoursite.com/wp-admin for most websites).
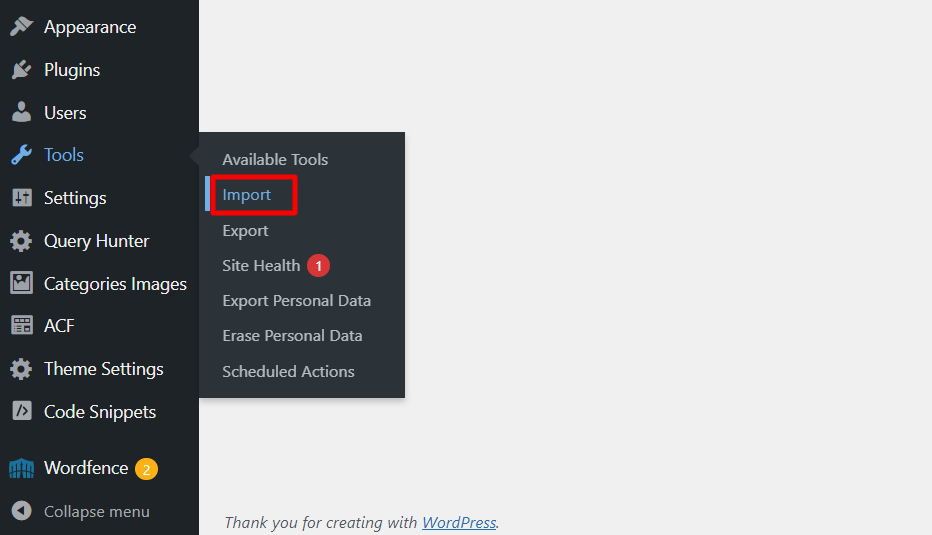
Navigate to the Tools section of your WP-admin left panel, and click on import. You can import the Webflow website content to your new WordPress site using any tool or plugin you want. There are some WordPress import plugins that allow you to do so.
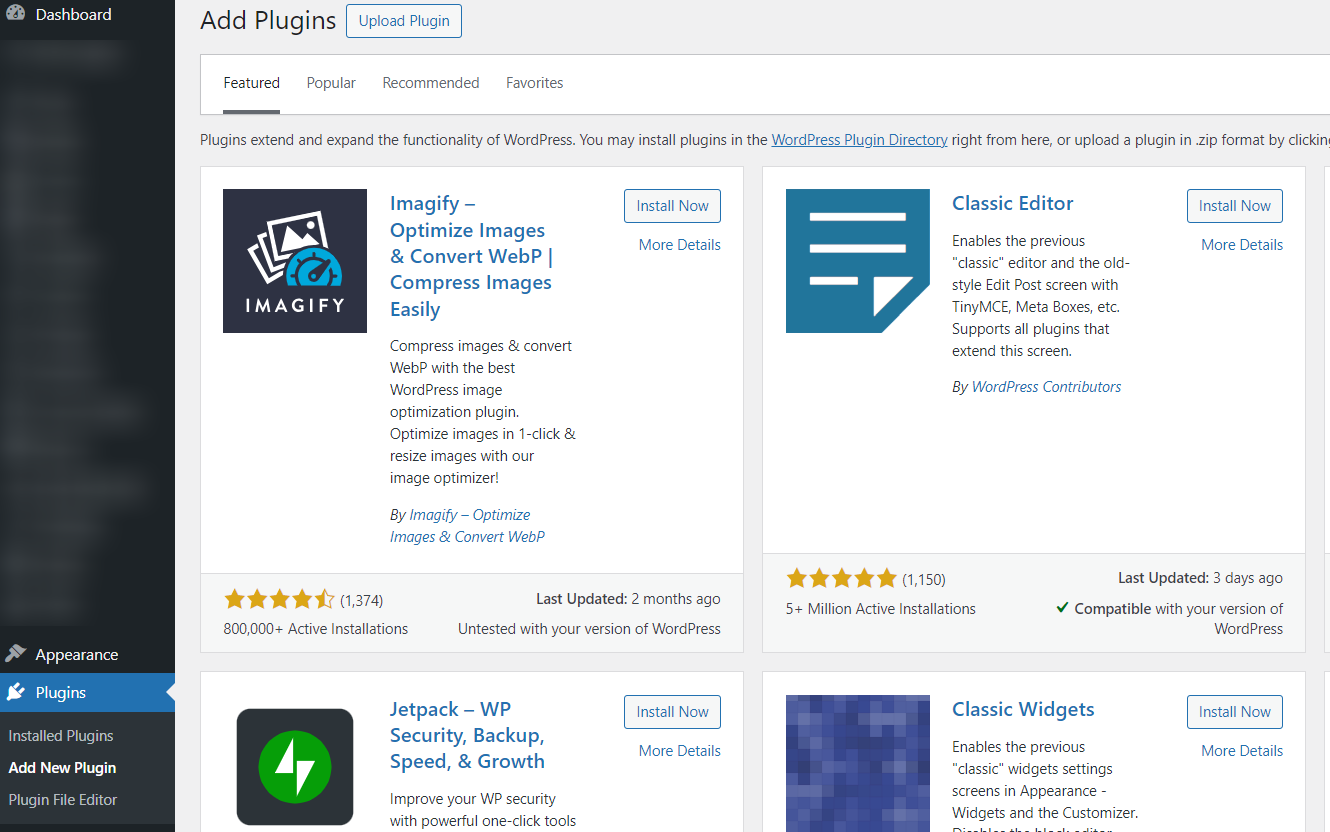
You may install the required plugins and start importing your Webflow files. Add the required plugin by navigating to ‘Add New Plugin’, searching for the plugin you want to use and installing it.

Alternatively, in the list of import tools, you’ll find an option for WordPress. Install(if not already), select this to proceed. WordPress will automatically install the necessary importer plugin for this task. Once the installation is complete, you’ll need to activate the plugin to start using it.

After the importer plugin is activated, you can now upload the files you exported from your Webflow dashboard containing the bulk of your website’s content and structure.
After uploading the files, you’ll be directed to the import settings page where you can configure your import settings.
Post-Import Steps
It’s important you check and review the imported Webflow files to ensure that all content has been transferred correctly and is displaying as intended.
Adding Images & Finalising Pages/Posts
Check for the migrated posts, pages, and gallery pages individually. Sometimes, fixing their structures is a necessity after migration. You might need to go through each page checking for structure and design to ensure smooth migration. Eventhough, it is not a time saving approach, it is essential.
Webflow exports do not automatically include images so you will need to add them to your WordPress site manually. You can upload the images to your WordPress media library and then use them into the appropriate pages or posts. If you want an automated approach or you have a large number of images, you can use a WordPress plugin to upload the images.

QA Contents
After you have completed the Webflow import, take the time to thoroughly review your new WordPress site. Ensure that all content from your Webflow site, including text, images, and other media, has been successfully migrated.
Another important aspect you might want to check are the permalinks of all the pages and posts. You need to make sure that they match your old permalinks, if you wish to preserve the SEO value of the page and keep ranking for the keywords you previously ranked for.
After the required content is available, you can make any necessary adjustments to layout, formatting, or content that may have been altered during the migration. This is also a good time to ensure that all features like menus, links and others are working correctly and that the site is functioning as intended.
Redirect From Webflow To WordPress
This is the final step after confirming your website content is imported as required and your WordPress site is ready for launch to replace the existing Webflow site. You will need to redirect your existing domain to your new WordPress website.
Read More: How to Migrate Your Website from Kentico to WordPress?
Ready for a seamless Webflow to WordPress transition? Let us guide you.
Making the leap from Webflow to WordPress can be challenging, and it can be a bit overwhelming when you are not a website expert. I hope this guide has helped you figure out the brief overview about the migration process and things to take care of.
It’s not just about moving content from one platform to another, it’s more about ensuring your site continues to perform and thrive with the new powerful WordPress environment.
We get it – the technicalities can be confusing, and every website has its unique features and needs. That’s why we offer personalised, hands-on support tailored to your specific migration needs. Whether it’s keeping your SEO performance intact, tweaking the design to feel just right, or ensuring all your plugins play nicely in the WordPress environment, we’ve got your back.
Why not make it easy on yourself? Reach out to us for a no-pressure, free website migration consultation. Book a free consultation now!
FAQs
Is it difficult to migrate from Webflow to WordPress?
The difficulty level depends on the complexity of your existing Webflow site and your familiarity with WordPress. While there are several steps involved, following a structured guide can make the process manageable, even for beginners.
If you are looking for assistance with migrating your Webflow site to WordPress, WP Creative can help. To get started, please book a free consultation.
Will my SEO be affected when I migrate from Webflow to WordPress?
There are chances of your existing SEO being affected when you migrate from Webflow to WordPress but if managed correctly, your SEO should not be significantly impacted. Some of the crucial steps in ensuring this is maintaining the same permalinks, URL structure and setting up proper 301 redirects.
Can I move my Webflow images to WordPress?
Yes, but you’ll need to manually upload your images to WordPress. Images are not included in the standard Webflow export. You can add them to your WordPress media library and insert them into your posts and pages. Another option is to use an image importer plugin in WordPress.
How long does it take to migrate from Webflow to WordPress?
The time required for the migration can vary depending on the size and complexity of your website. It can take anywhere from a few hours to several days to complete the entire migration process. If your Webflow site is complex, we recommend taking help of WordPress experts like us.
Do I need coding knowledge to migrate from Webflow to WordPress?
While you do not need coding knowledge, basic knowledge of HTML and CSS can be helpful, especially for customising your WordPress website after migration. As WordPress’s user-friendly interface allows for much of the work to be done without coding but you need to be familiar with Webflow and WordPress platform.
